
NOTE: Updating this because Next.js now specifically supports Google Tag Manager via the @next/third-parties library.
@next/third-parties is a library that provides a collection of components and utilities that improve the performance and developer experience of loading popular third-party libraries in your Next.js application.
Background
Google Tag Manager software from Google that allows you to deploy various types of code (tags) to your website. Some good examples of tags would be Google Analytics tracking codes, Google Analytics event codes, Google Ads conversion script and remarketing tags. There are many more types of code that can be added to your website using GTM, including custom codes.
Google Tag Manager and Google Analytics explanation:
Google Tag Manager does not replace Google Analytics. Instead, it helps you easily add Google Analytics tracking to a website and define rules when each tag fires. In other words Google Tag Manager and Google Analytics work together!
Prior to GTM, GA tracking codes had to be hard-coded by a web developer on each individual page. Having hundreds of events is very difficult when it comes to maintaining/updating them. But Google Tag Manager solves this problem because all your tags are stored in one place – your GTM account.
Google Tag Manager also lets you test your tags to make sure they are triggered when you load the right page or click a particular button. Another great benefit: you can change your tags and the way they work without actually changing the source code of your website – instead you just edit tags in GTM user interface and publish changes with a click of a button.
Note in order the setup GTM and GA you will need both a GTM Container ID from your Tag Manager Account (which looks like "GTM-XXXXXXX") and a Google Analytics account and property and a measurement ID. A Google Analytics GA4 ID will look like "G-XXXXXXXXXX". To add GTM to your Nextjs site you will only need the GTM Container ID - the rest of the configuration is done via the GTM UI.
Here we go:
Create a Google Tag Manager Account
Create an account, or use an existing account, at Google Tag Manager. A new container is created by default, and you can create additional containers within each account.
A Tag Manager account represents the topmost level of organization. Typically, only one account is needed per company. A Tag Manager account contains one or more containers, and there are specific container types that may be used for websites, AMP pages, Android apps, and iOS apps.
Create an Account/Container inside Tag Manager
In Tag Manager, click Accounts and then Create account.
- Enter an account name and indicate whether you'd like to share data anonymously with Google and others.
- Enter a descriptive container name and select the type of content: Web, AMP, Android, or iOS. For our purposes choose web..
- Click Create.
- Review the Terms of Service and click Yes.
When your new container first loads, you will be prompted with the web container installation code snippet. All you need here is the GTM Container ID.
Install the container in your Nextjs app
This is surprisingly the simplest step. Next.js has an example here.
import { GoogleTagManager } from '@next/third-parties/google'
export default function RootLayout({
children,
}: {
children: React.ReactNode
}) {
return (
<html lang="en">
<GoogleTagManager gtmId="GTM-XYZ" />
<body>{children}</body>
</html>
)
}That's it! Google Tag Manager is installed in your Nextjs app assuming you have set your envronment variable to your GTM Container ID.
Add and publish your tags
The rest of the work is done by configuring Google Tag Manager. That is the power of GTM - your coding is done - the rest is all configuration. Most Tag Manager implementations start with a Google Analytics page view tag deployment. Here are step by step instructions for how to deploy a Google Analytics tag.
There is a significant "gotcha" for Nextjs apps - actually all "Single Page Apps" (SPAs). That's because of how SPA's work, and not related to Nextjs per se - when you navigate pages in Nextjs the page view doesn't fire because the page didn't change! If you'd like to fire GTM correctly on each page navigation, be sure to enable the "History Change" trigger, as described here.
Your configuration in GTM should look like this as a bare minumum:
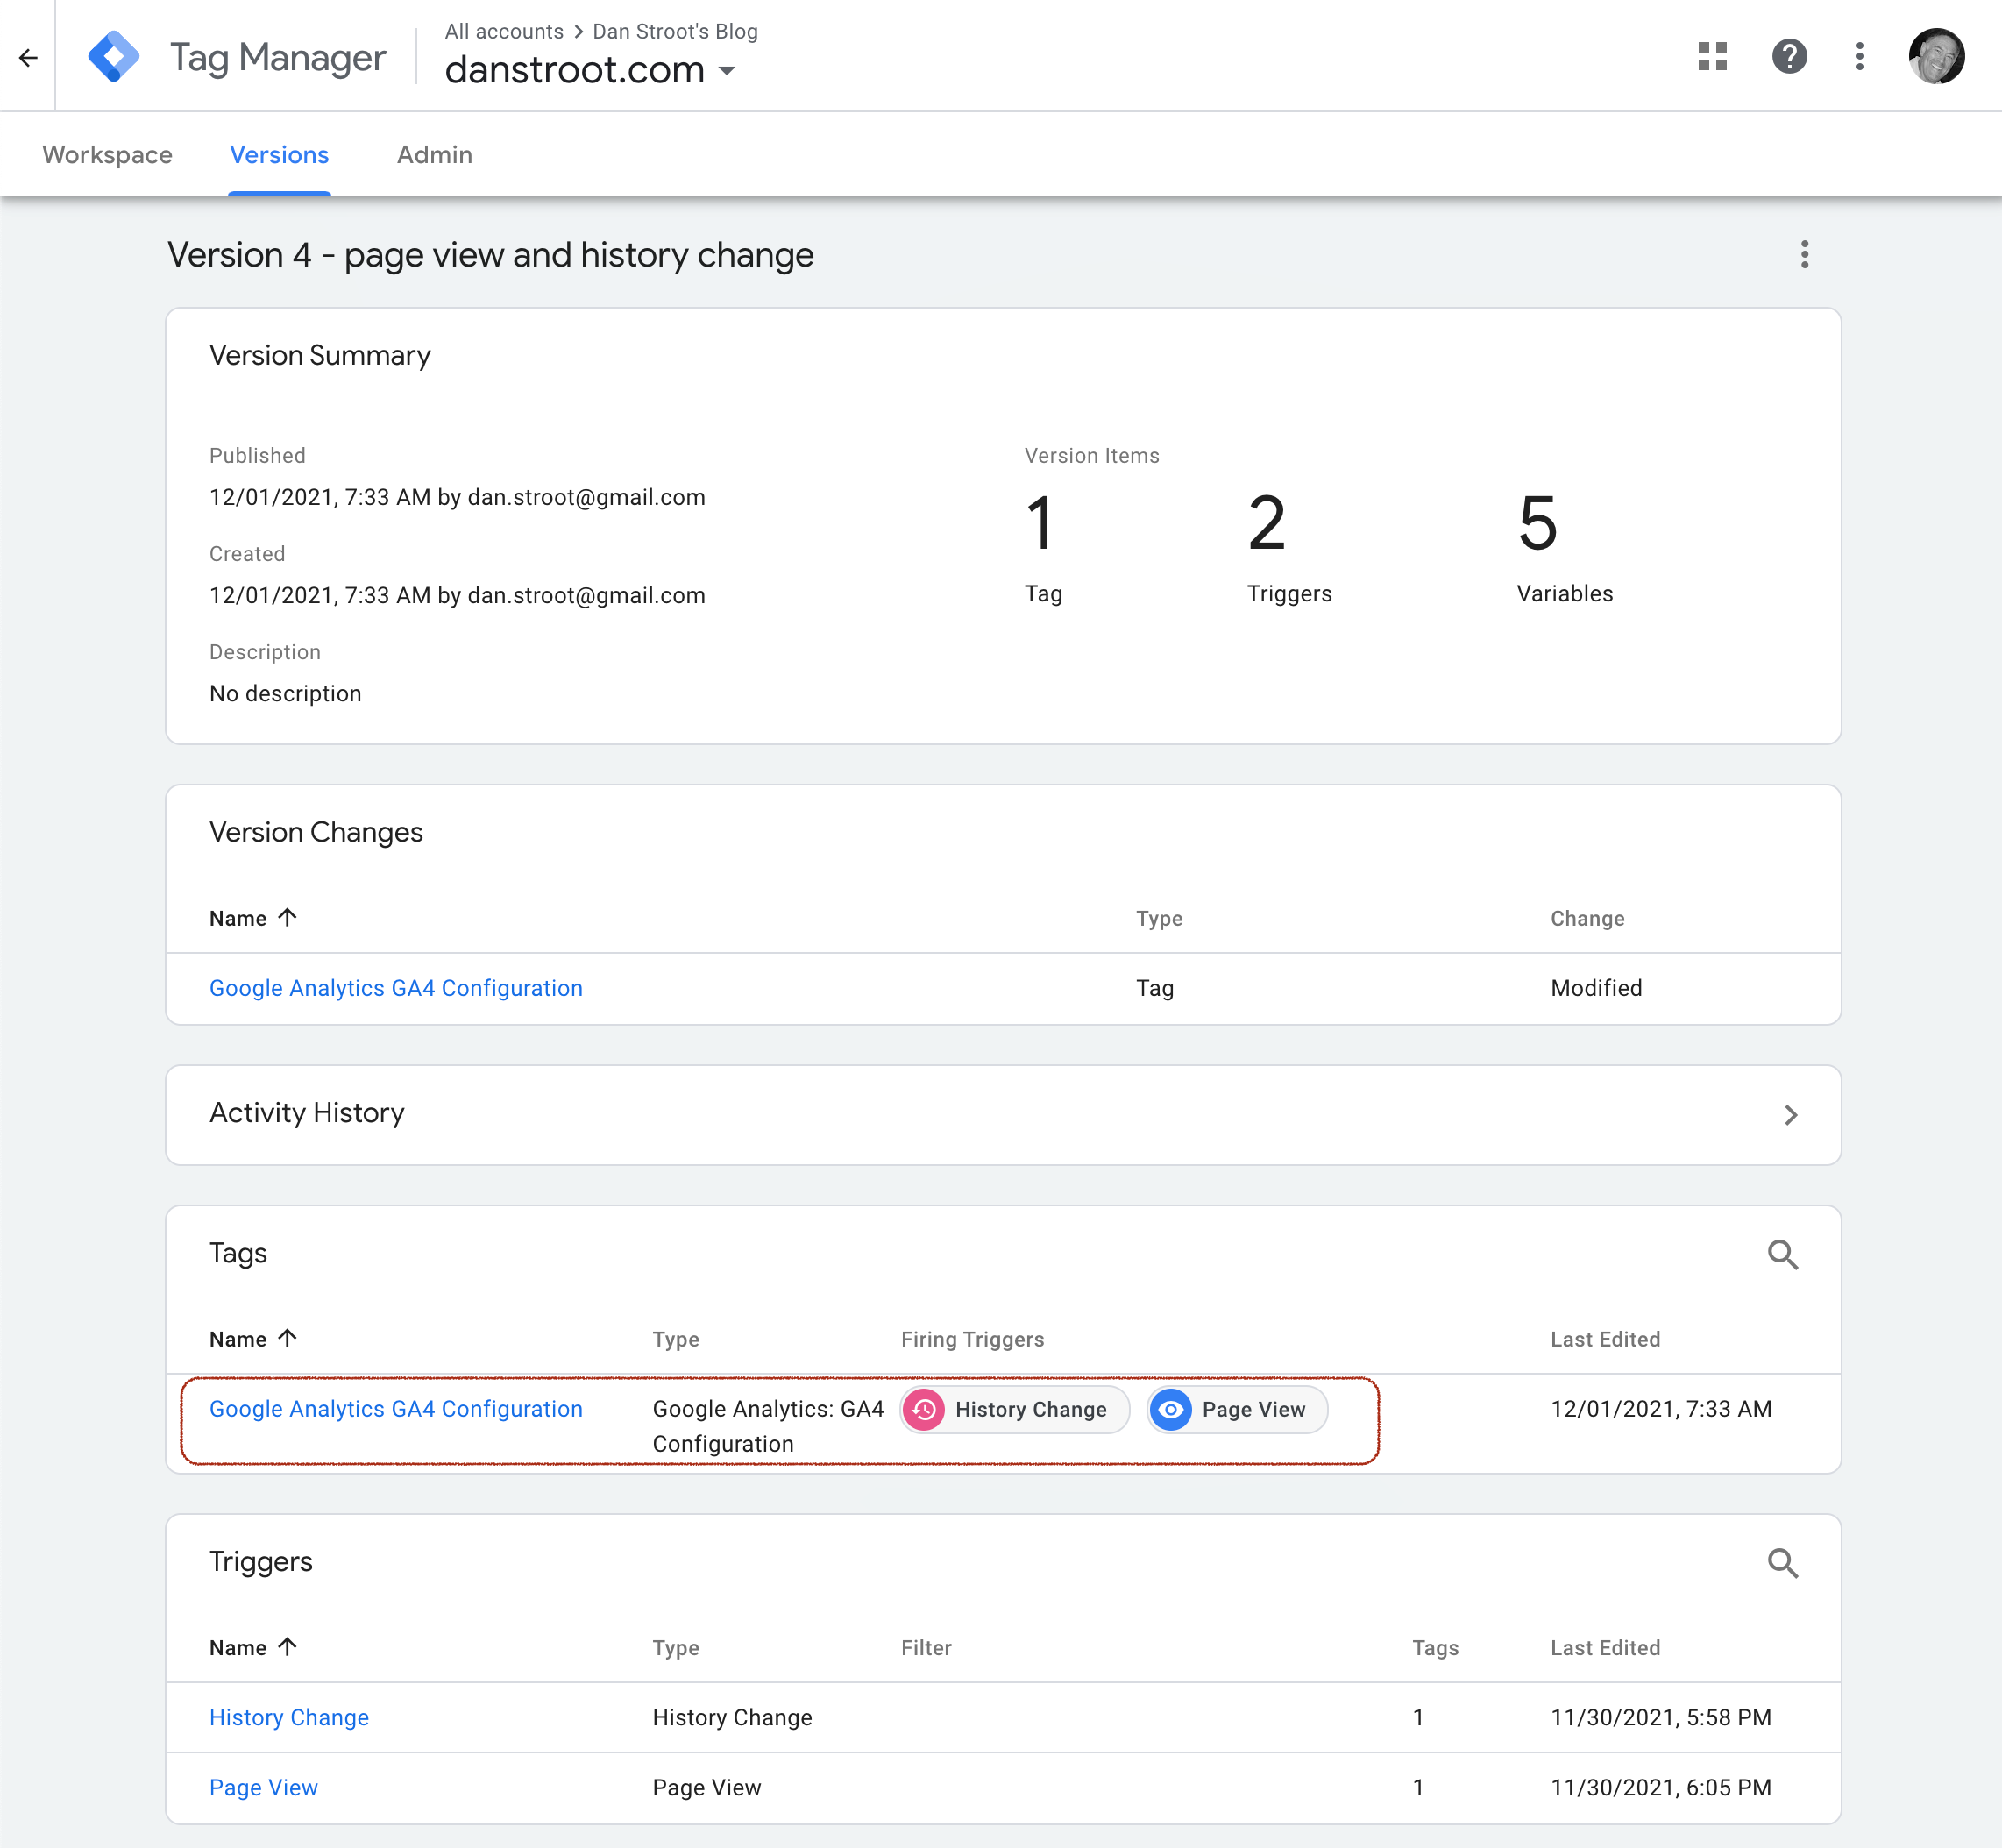
That's it! Now if you want to get fancy and show your Google Analytics stats inside your site check this out!